Setting Themes
One of the most important steps in setting up a WordPress site is choosing a theme. WordPress themes are templates that change the layout and look of your site. They can make your site more appealing and easier to navigate, more professional, or more centered on blogs or portfolios. Bridgewater offers a lot of different themes and styles for you to choose from that fit the needs of your site.
Watch this video or read through the tutorial below.
How to select a theme
To get started, go to your dashboard, navigate to the Appearance Tab and select Themes.
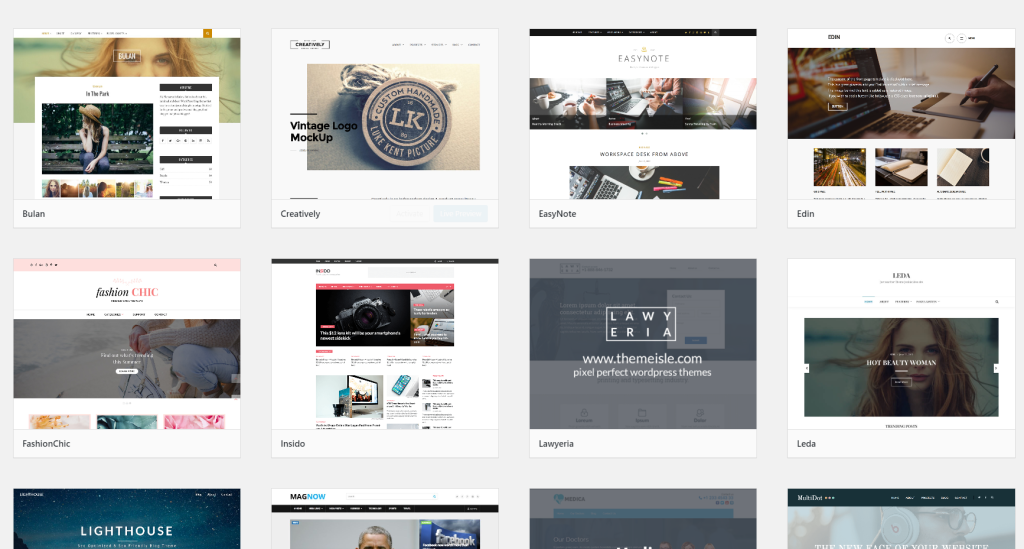
From here you can scroll through the different themes you can use. To see what a theme would look like with your site, click on a theme you like and select Live Preview at the bottom of the popup window.
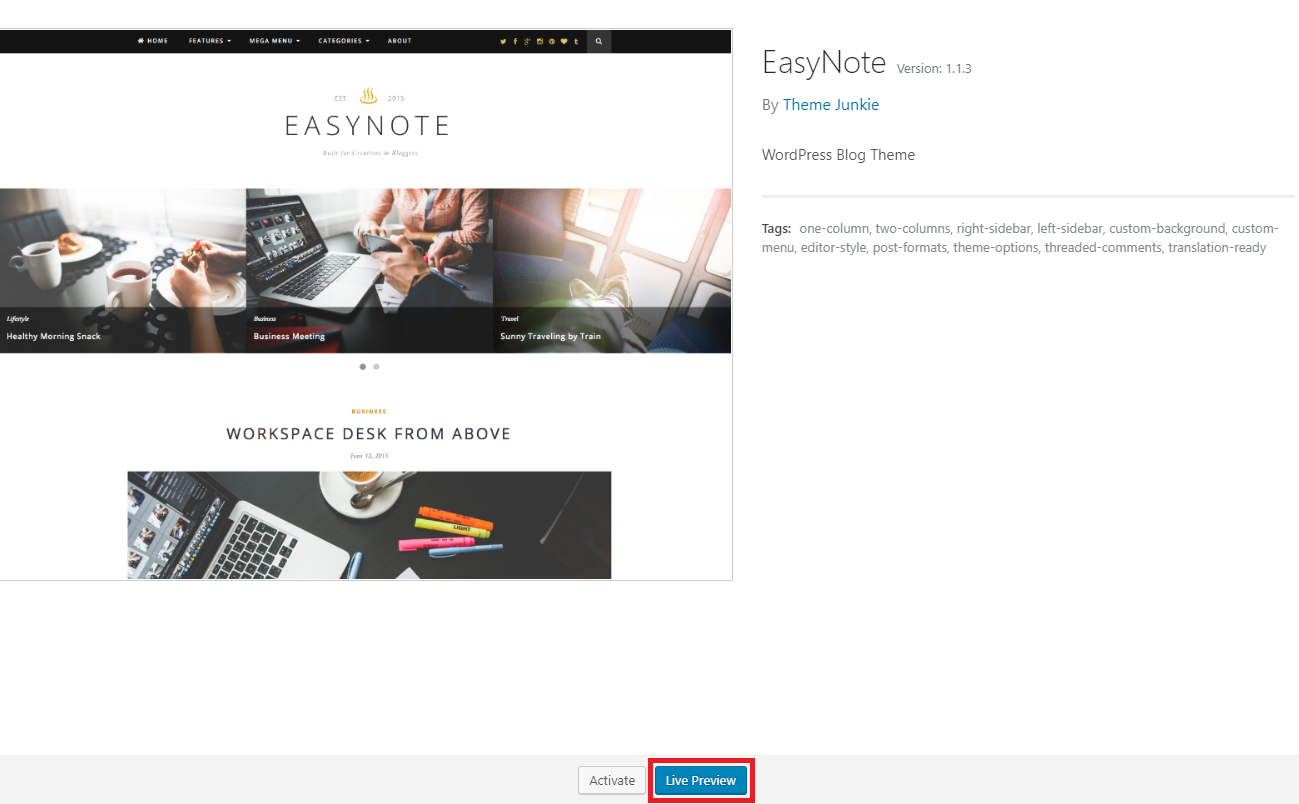
After selecting Live Preview, you will be taken to the theme editing screen. You will see a snapshot of what your site will look like with the currently selected theme. If you like the theme you selected, you can press Activate & Publish to make this your live theme. If not you can press the “X” in the top left corner to return to the themes menu.
For this tutorial, we are going to select the EasyNote theme. Click Activate & Publish and now you have a new theme you can begin to customize!
How to modify a theme
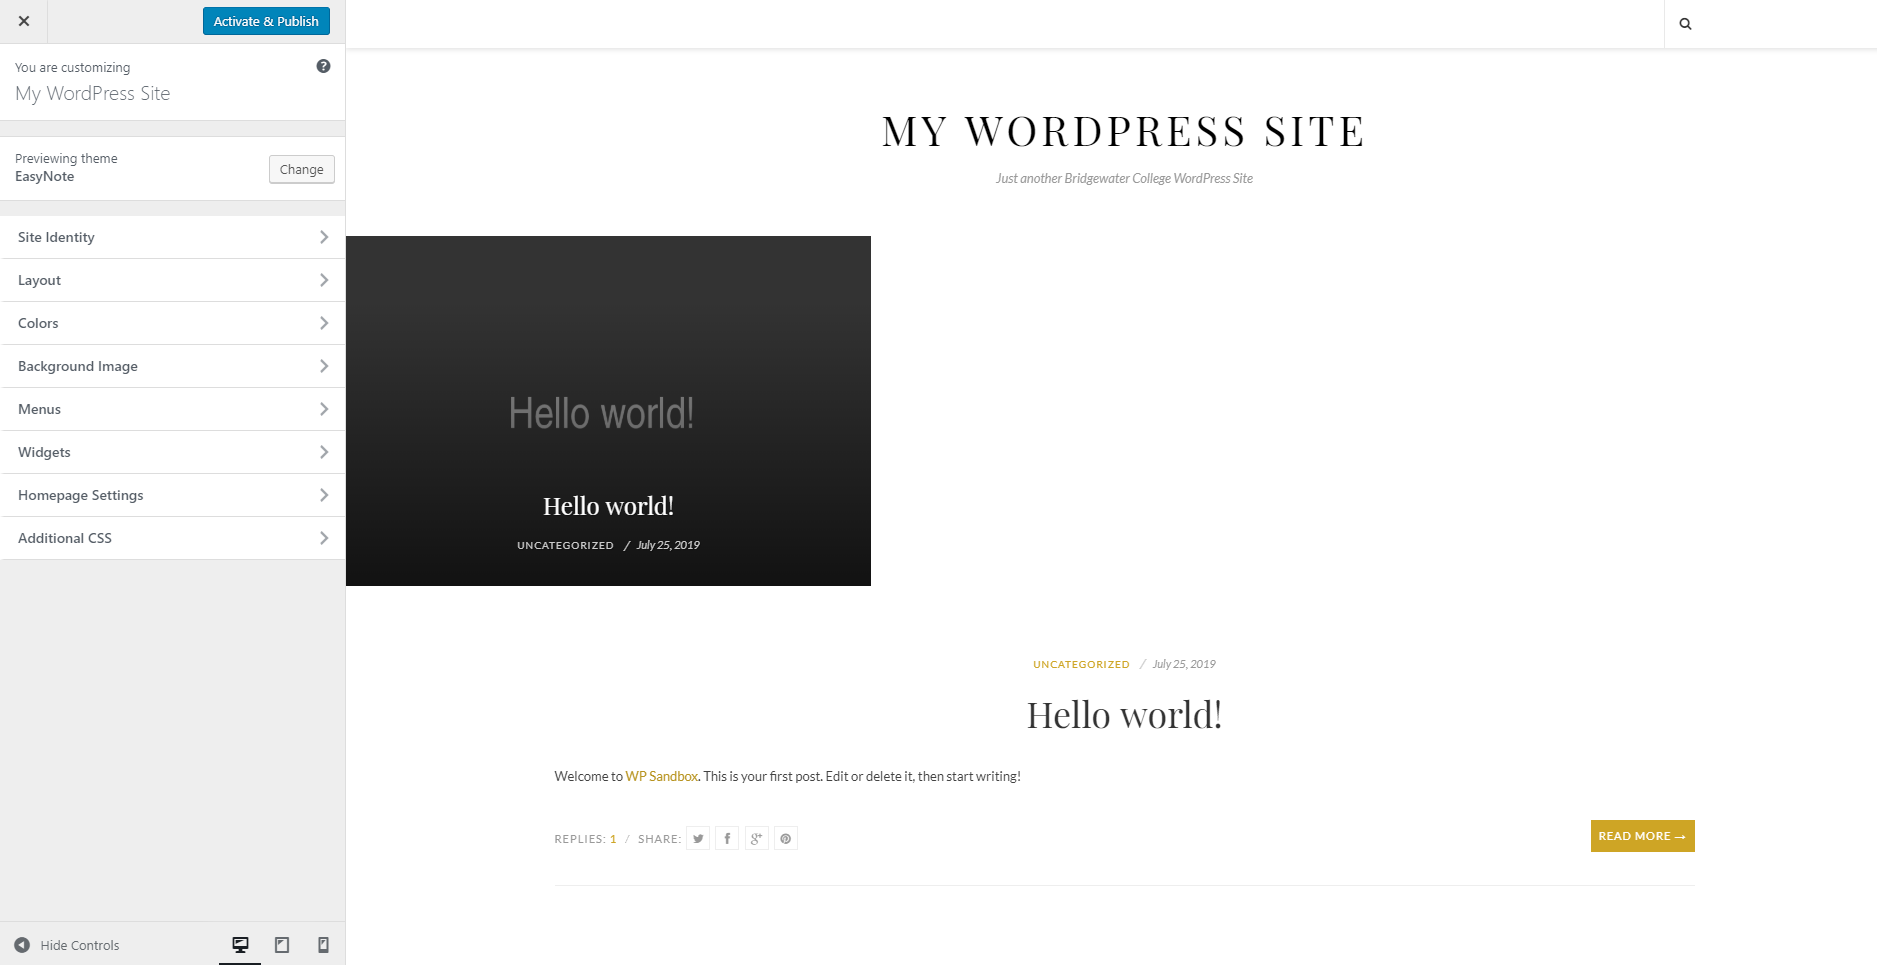
Even though you have a theme selected, you can still alter the way it looks. To do this, select Customize at the top of the screen.

It is important to note that the location of these settings may vary from theme to theme. Some themes are more complicated with more options for customization, while others are less complicated with less options for customization. The EasyNote theme we have selected is a simple theme. The options we have to customize this theme are shown below.

Site Identity allows you to change the site’s main title (My WordPress Site) and tagline (Just another Bridgewater College WordPress Site). Some themes allow you to add a logo to your site as well!
Layout lets you change how many columns your site has. Full width means there is only one column and a sidebar means your site would be two columns.
Colors allows you to change the background color of the site making it very easy to change the way you want your site to look! Depending on your theme, you may also be able to change the colors of links, text, headers, and more! Sometimes this setting may be called “Design” or “Theme Options”. You will have to explore each theme to see where different settings are.
Background Image does exactly what is says. You can add a image to the background, and adjust placement and size of that image.
Menus allow you to customize the navigation of the site. This is typically done by adding “Pages” to your site. We will go over how to do this later in the tutorial.
Widgets are independent sections of content on a webpage. In WordPress, widgets are commonly placed in the sidebar or footer. This is where you would go to add or remove widgets.
Homepage Settings let you transform your homepage of the site from a blog page into a normal web page! Most WordPress site themes default the main page to show blog “Posts”. You may want a normal homepage that always shows the same content. We will go over this more next.
These are just some of the options you have to customize your site. Remember all themes are different. If you explore the options each theme offers, you can create a site that is as personal as you desire! So have fun and play around with each theme’s customization possibilities.
Next Session: Adding/Editing Content Pages